
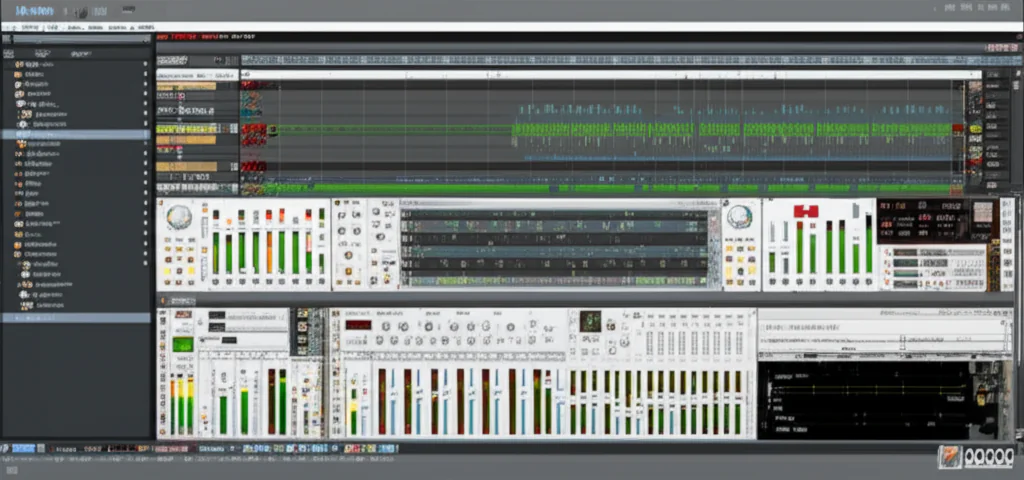
Stop guessing with your cables and start creating; the ultimate Reason Studios tutorials guide reveals exactly how to turn the software’s unique rack view into your most powerful sound design weapon. We’ve compiled the definitive roadmap to mastering CV modulation, Combinator routing, and the hybrid workflow, ensuring you never feel lost in the back of the rack again.
Imagine spending hours trying to get a rhythmic distortion effect, only to realize a single CV cable could have done it in seconds. That was our team’s experience when we first switched from a standard DAW to Reason; the learning curve felt like climbing a vertical wall until we found the right Reason Studios tutorials that explained the “why” behind the “how.”
Did you know that the Combinator device alone can hold over 25 parameters for mapping, allowing you to build entire orchestras inside a single plugin instance? This isn’t just a feature; it’s a paradigm shift that separates hobbyists from professional sound designers.
Key Takeaways
- Master the Rack View: The unique ability to flip the rack and patch cables via CV is the core differentiator of Reason, offering analog-style modulation impossible in standard DAWs.
- Hybrid Workflow: You don’t need to abandon your current DAW; the Reason Rack Plugin allows you to use Reason’s instruments and effects inside Ableton, Logic, or FL Studio seamlessly.
- Combinator Power: Learning to map multiple device parameters to a single Combinator interface is the fastest way to create complex, playable sound rigs.
- Community Wisdom: Leveraging Refills and community forums like ReasonTalk can solve specific routing mysteries, such as the infamous Mono/Stereo confusion, in minutes.
👉 Shop Reason Studios on:
- Official Website: Reason Studios
- Amazon: Reason Studios Software
- Sweetwater: Reason Studios
Table of Contents
- ⚡️ Quick Tips and Facts
- 🕰️ The Evolution of Reason: From Rack to Plugin
- 🚀 Getting Started: Your First Steps in the Reason Studio
- 🎛️ Mastering the Core: Essential Tutorials for Beginners
- 1. Navigating the Rack and Desktop View Like a Pro
- 2. Building Your First Patch from Scratch
- 3. Understanding the Mixer and Signal Flow
- 4. Recording Audio and MIDI Without the Headaches
- 5. Basic Automation: Making Your Tracks Breathe
- 🧠 Deep Dives: Advanced Reason Tutorials for Sound Designers
- 1. Mastering the Combinator for Complex Instrument Rigs
- 2. Sculpting Sounds with the Scream 4 and CV Modulation
- 3. Advanced Routing: CV, Gate, and Audio Sidechaining
- 4. Creating Custom Drum Racks and Grove Pools
- 5. Mixing and Mastering Inside the Reason Environment
- 🔌 The Hybrid Workflow: Using the Reason Rack Plugin in Other DAWs
- 1. Installing and Configuring VST, AU, and AX Versions
- 2. Seamless Integration with Ableton Live, Logic Pro, and FL Studio
- 3. Troubleshooting Latency and Buffer Issues in External Hosts
- 🎥 Curated Video Playlists: From Easy Wins to Expert Moves
- Easy Reason Tutorials: The 5-Minute Fixes
- Advanced Reason Tutorials: Pushing the Limits
- Featured Videos: Top Community Creations
- Collaborations: Learning from the Pros
- Shorts: Quick Hacks and Hidden Gems
- 🌐 Community Wisdom: Solving the Mono/Stereo and Routing Mysteries
- 🛠️ Troubleshooting Common Hiccups and Glitches
- 🏁 Conclusion
- 🔗 Recommended Links
- ❓ FAQ
- 📚 Reference Links
⚡️ Quick Tips and Facts
Before we dive into the deep end of the Reason Studios ocean, let’s drop a few anchor lines to keep you from drifting off course. We’ve seen too many producers get stuck in the “rack view” rabbit hole, only to realize they forgot to record a single note. Here’s the lowdown from our Uniphonic™ team:
- The Rack is Your Best Friend (and Worst Enemy): Unlike other DAWs where everything is flat on a timeline, Reason’s Rack View is a virtual hardware closet. You can flip it over to see the back, patching cables like a mad scientist. This is unique to Reason and is the core of its sound design philosophy.
- Combinator is Magic: If you aren’t using the Combinator, you’re basically leaving free money on the table. It allows you to bundle instruments, effects, and macros into a single device. We’ve built entire orchestras inside one Combinator preset.
- CV is King: Reason isn’t just MIDI; it’s Control Voltage (CV). This allows for analog-style modulation that most other DAWs can only dream of without extra plugins. You can modulate almost anything with almost anything else.
- The “Reason Rack Plugin”: You don’t need to buy Reason to use its gear. You can run the Reason Rack Plugin inside Ableton Live, Logic Pro, FL Studio, and more. It’s a hybrid workflow that saves our sanity daily.
- Refills are Gold: The community creates Refills (sound packs) that are often superior to stock sounds. They are the lifeblood of the Reason ecosystem.
For a deeper dive into why this software has such a cult following, check out our full breakdown on Reason Studios.
🕰️ The Evolution of Reason: From Rack to Plugin
Reason didn’t just appear; it evolved from a quirky experiment into a production powerhouse. When Reason 1.0 launched in 20 by Propellerhead Software (now Reason Studios), it was a revelation. It simulated a rack of hardware synthesizers, drum machines, and effects units. The catch? You couldn’t record audio into the software; you had to route the audio out to an external interface.
Fast forward to Reason 10, and the game changed forever. They introduced the Reason Rack Plugin, allowing the entire rack to run as a VST/AU/AX plugin inside other DAWs. Then came Reason 1, which finally allowed native audio recording and track lanes, merging the best of both worlds.
Why does this history matter to you? Because understanding the “hardware mindset” of early Reason helps you appreciate why the CV modulation system is so robust today. It wasn’t designed to mimic a computer; it was designed to mimic a studio.
“Come along and explore unexpected creative paths, have fun and dare to be different – while trying to figure out how you can make your music sound like you.” — Reason Studios Official Channel
This philosophy is baked into every update, from the tag-based browser in Reason 13 to the new PolyTone synthesizer.
🚀 Getting Started: Your First Steps in the Reason Studio
So, you’ve installed Reason. The screen is blank, the rack is empty, and you’re staring at a wall of virtual knobs. Don’t panic. We’ve all been there. The first step is to stop trying to “make a beat” and start learning the workflow.
The Desktop vs. Rack View
Reason has two main views: Desktop (where you arrange your song) and Rack (where you build your sounds).
- Desktop: Think of this as your mixing console and arrangement window. You see tracks, clips, and the mixer.
- Rack: This is your instrument closet. You see the front of devices.
- The Flip: Press
Tabon your keyboard. This flips the rack to show the back, where the magic happens: patching cables.
Your First Device
Don’t start with a complex synth. Start with a Drum Rack or the Kong Drum Designer.
- Click the Create button (or press
Ctrl+T/Cmd+T). - Select a device.
- Notice how it automatically appears in your track list? That’s the beauty of Reason’s integration.
If you’re coming from a different DAW, you might miss the “track-based” workflow initially. But once you realize that every device in the rack can be its own track, the lightbulb goes on.
For more on how to structure your sessions, read our guide on Music Production Techniques.
🎛️ Mastering the Core: Essential Tutorials for Beginners
Now that you know where the buttons are, let’s talk about actually making music. These are the five pillars every Reason beginner must master.
1. Navigating the Rack and Desktop View Like a Pro
The biggest hurdle for new users is the Tab key. It’s your superpower.
- Front View: Adjust knobs, load presets, tweak parameters.
- Back View: Connect CV cables, audio cables, and gate signals.
- Pro Tip: You can resize the rack window. If you have a wide monitor, maximize it. If you’re on a laptop, learn to use the scroll bars efficiently.
2. Building Your First Patch from Scratch
Forget presets for a moment. Let’s build a simple bass patch.
- Add a Subtractor synthesizer.
- Load a basic saw wave.
- Add a Filter (it’s already there, but let’s tweak it).
- Connect an LFO to the filter cutoff.
- Wait, how do I connect them? That’s the fun part. You don’t need to patch cables for basic synth parameters; you just click the “Modulation” tab in the device. But for advanced stuff, you’ll need the back of the rack.
3. Understanding the Mixer and Signal Flow
Reason’s mixer is automatic. Every device you add gets a channel strip.
- The Mixer Window: Press
Mtoggle the mixer. - Routing: You can route any channel to any other channel. This is crucial for sidechaining and bus processing.
- Insert vs. Send: Learn the difference. Insert effects go in the chain; Send effects (like reverb) go out and come back.
4. Recording Audio and MIDI Without the Headaches
Since Reason 1, recording audio is native.
- Audio Tracks: Create an audio track, select your input, and hit record.
- MIDI Tracks: Create a MIDI track, select your instrument, and play.
- The “Record Enable” Button: It’s the red circle on the track header. Don’t forget to click it!
5. Basic Automation: Making Your Tracks Breathe
Static tracks are boring.
- Write Mode: Click the “Write” button on the mixer or device. Move a knob while the transport is playing.
- Read Mode: Switch to “Read” to hear your changes.
- Clip Automation: You can also draw automation directly in the MIDI clip editor.
For more on plugin integration, check out our Plugin Recommendations.
🧠 Deep Dives: Advanced Reason Tutorials for Sound Designers
Ready to stop sounding like a beginner? It’s time to get your hands dirty with CV, Combinators, and Scream 4. This is where Reason separates itself from the pack.
1. Mastering the Combinator for Complex Instrument Rigs
The Combinator is the ultimate organizational tool.
- What it does: It stacks multiple devices (synths, drums, effects) into one unit.
- The Magic: You can map parameters from all those devices to the Combinator’s front panel knobs.
- Use Case: Create a “Super Lead” that has a synth, a distortion, a delay, and a filter, all controlled by one knob.
- Pro Tip: Use the “Map” tab in the Combinator to assign ranges. You can make a knob turn a filter from 0% to 10% while simultaneously opening a delay feedback from 0% to 50%.
2. Sculpting Sounds with the Scream 4 and CV Modulation
The Scream 4 is a legendary distortion unit. But it’s not just for distortion.
- CV Inputs: The Scream 4 has CV inputs for Cutoff, Drive, and Tone.
- The Hack: Connect an LFO to the Cutoff CV input. Now your distortion is pulsing rhythmically.
- Scream 4 vs. Other Distortions: Unlike standard saturators, the Scream 4 has a “Pulse” mode that creates rhythmic gating effects, perfect for techno and house.
3. Advanced Routing: CV, Gate, and Audio Sidechaining
This is the “Reason Secret Sauce.”
- CV Cables: Connect an LFO to a filter, a sequencer to a filter, or even a drum hit to a filter.
- Gate Cables: Use a drum hit to trigger an envelope on a synth.
- Sidechaining: In other DAWs, you need a plugin to sidechain. In Reason, you can use the Sidechain Tool (new in Reason 13) or route the audio directly to a compressor’s sidechain input.
- The “Mono/Stereo” Question: A common confusion in the community is how to handle mono vs. stereo signals in the rack. We’ll tackle this in the Community Wisdom section later, but remember: CV is mono, but audio can be stereo.
4. Creating Custom Drum Racks and Grove Pools
The Drum Rack is a grid of pads.
- Customization: Drag and drop any sample onto a pad.
- Grove Pools: These are pre-made MIDI patterns. You can drag a groove onto a MIDI clip to instantly quantize it with a human feel.
- Pro Tip: Use the Redrum device for classic 808/909 sounds, or the Kong for more complex, programmable drum synthesis.
5. Mixing and Mastering Inside the Reason Environment
You don’t need an external DAW to mix.
- Mastering Chain: Use the MClass mastering suite (or the newer Mastering Tools in Reason 13).
- Bus Processing: Route all your drums to a “Drum Bus” and add compression.
- Limiting: Always end with a limiter on the master channel.
For more on hardware vs. software workflows, see our Hardware vs Software comparison.
🔌 The Hybrid Workflow: Using the Reason Rack Plugin in Other DAWs
What if you love Logic Pro but want Reason’s synths? Or you’re a die-hard Ableton user? Enter the Reason Rack Plugin.
1. Installing and Configuring VST, AU, and AX Versions
- Installation: When you install Reason, it automatically installs the plugin versions.
- Scanning: Open your host DAW (Ableton, Logic, FL Studio) and scan for new plugins. Look for “Reason Rack Plugin.”
- Configuration: You can choose to run the plugin in “Standalone” mode or as a plugin.
2. Seamless Integration with Ableton Live, Logic Pro, and FL Studio
- Ableton Live: The integration is tight. You can map Reason parameters to Ableton’s macros.
- Logic Pro: Use the AU version. It behaves like a native Logic instrument.
- FL Studio: The VST version works flawlessly.
- The Workflow: Create a MIDI track in your host, load the Reason Rack Plugin, and build your rack inside it. You can even open the rack view inside the host window.
3. Troubleshooting Latency and Buffer Issues in External Hosts
- The Issue: Running a heavy rack inside another DAW can cause latency.
- The Fix: Increase your buffer size in the host DAW’s audio settings.
- Optimization: Freeze tracks if the CPU is maxing out.
🎥 Curated Video Playlists: From Easy Wins to Expert Moves
Reason Studios has an incredible library of video content. We’ve curated the best paths for you.
Easy Reason Tutorials: The 5-Minute Fixes
These are perfect for when you’re stuck.
- Topics: “How to add reverb,” “How to fix MIDI timing,” “Basic routing.”
- Why Watch: They are short, punchy, and get you back to making music fast.
Advanced Reason Tutorials: Pushing the Limits
- Topics: “CV modulation deep dive,” “Building a modular synth in Reason,” “Advanced mixing techniques.”
- Why Watch: These will change how you think about sound design.
Featured Videos: Top Community Creations
The community is active. Check out the Featured Videos section on the official channel for user-generated content that often shows workflows the official team misses.
Collaborations: Learning from the Pros
Reason Studios frequently collaborates with top producers like Deadmau5, Skrilex, and Flume. These sessions show how the pros use the software in real-world scenarios.
Shorts: Quick Hacks and Hidden Gems
Don’t ignore the Shorts. They are often 60-second clips showing a specific trick, like “How to randomize velocities” or “One-knob sound design.”
🌐 Community Wisdom: Solving the Mono/Stereo and Routing Mysteries
We mentioned the Mono/Stereo confusion earlier. Let’s resolve it now, because it’s a frequent topic on forums like ReasonTalk.
The Problem: Users often ask, “Why is my CV signal mono?” or “Why does my stereo image collapse?”
The Answer:
- CV is Mono: Control Voltage signals in Reason are strictly mono. If you want to modulate a stereo parameter, you need to split the CV or use a device that handles stereo modulation internally.
- Stereo Imaging: The Stereo Tool (new in Reason 13) is your best friend here. It allows you to widen or narrow the stereo field of any track.
- Routing: If you want a mono signal to become stereo, use a reverb or delay with stereo outputs. If you want a stereo signal to become mono, use the Stereo Tool set to “Mono” or sum the channels in the mixer.
For more on this specific topic, check out the discussion on ReasonTalk.com (note: you may need to verify you’re human to view the full thread).
🛠️ Troubleshooting Common Hiccups and Glitches
Even the best software has bugs. Here’s how to handle the common ones.
- Plugin Won’t Load: Make sure your DAW is updated. Sometimes, a new version of Reason requires a newer version of the host.
- Audio Crackling: Increase your buffer size. If you’re using the Rack Plugin, check the host’s audio driver settings.
- MIDI Not Recording: Ensure the track is “Record Enabled” and the input is set to the correct MIDI port.
- Crash on Launch: Try resetting the preferences. Hold
Shiftwhile launching Reason to reset settings.
If you’re looking for more sound packs to fix your “empty project” syndrome, explore our Reason Refills category.
🏁 Conclusion
So, where does this leave you? You’ve gone from staring at a blank rack to understanding the nuances of CV modulation, Combinator mapping, and hybrid workflows. The journey from “What is this Tab button?” to “I just built a modular synth in a plugin” is one of the most rewarding experiences in music production.
The Verdict:
- Positives: Unmatched sound design capabilities via CV, the unique rack workflow, the ability to run as a plugin in any DAW, and a massive community.
- Negatives: The learning curve is steeper than “drag-and-drop” DAWs, and the interface can feel cluttered at first.
- Recommendation: If you are a sound designer, electronic music producer, or someone who loves tweaking knobs, Reason Studios is a must-have. Even if you use another DAW as your main host, the Reason Rack Plugin is worth the price of admission alone.
Don’t let the “Mono/Stereo” confusion or the complex routing scare you off. Embrace the chaos, flip the rack, and start patching. The most unexpected creative paths are waiting for you.
🔗 Recommended Links
Ready to upgrade your setup? Here are the tools and resources we recommend:
👉 Shop Reason Studios on:
- Official Website: Reason Studios
- Amazon: Reason Studios Software
- Sweetwater: Reason Studios
- Guitar Center: Reason Studios
Essential Books:
- The Reason 12 Guide (Check Amazon for the latest edition)
- Sound Design: The Definitive Guide
Community & Sound Packs:
- Loopmasters for high-quality Refills.
- Plugin Boutique for third-party devices.
❓ FAQ
What are advanced Reason Studios techniques for electronic music?
Advanced techniques include CV modulation for rhythmic control, using the Combinator to create complex multi-instrument rigs, and leveraging the Scream 4 for unique distortion textures. You can also use Rack Extensions (REs) to expand the software’s capabilities beyond the stock devices.
Read more about “🎬 Yes! Master High-Quality Film & Game Sound with Virtual Instruments (2026)”
Can Reason Studios tutorials help improve mixing skills?
Absolutely. Reason’s mixer is intuitive and powerful. Tutorials often cover bus processing, sidechaining, and automation, which are transferable skills to any DAW. The visual nature of the rack helps you understand signal flow better than abstract mixer views.
Read more about “What Are Reason Refills? Unlock Pro Music Production Magic 🎹 (2026)”
How do I create custom patches in Reason Studios?
Start by adding a device (like a synth or drum machine). Tweak the parameters to your liking. Then, save the patch by clicking the “Save” button in the device window. For complex patches, use the Combinator to bundle multiple devices and map their parameters to the front panel.
Read more about “🎛️ Reason Studios Software: The Ultimate 2026 Guide to Modular Magic”
What are essential Reason Studios tips for music production?
- Use the Tab key to flip the rack and patch cables.
- Leverage the Combinator for organization.
- Explore the CV inputs for dynamic modulation.
- Use the Sidechain Tool for clean, punchy mixes.
- Download Refills to expand your sound library.
Read more about “🎛️ 10 Ways to Master Creative Bass Sound Design with Reason Refills (2026)”
Are there free Reason Studios tutorials available online?
Yes! The official Reason Studios YouTube channel has hundreds of free tutorials. Additionally, the ReasonTalk forum and community blogs offer countless free guides and tips.
Read more about “🎛️ 15 Best Reason Sample Packs to Transform Your Tracks (2026)”
How can I learn sound design using Reason Studios?
Start with the Subtractor and Thor synthesizers. Learn how oscillators, filters, and envelopes work. Then, move on to CV modulation to create evolving, organic sounds. Experiment with the Scream 4 and RV70 reverb for texture.
Read more about “🎹 Does Reason Studios Support MIDI Controllers? The Ultimate 2026 Guide”
What are the best Reason Studios tutorials for beginners?
The “Easy Reason Tutorials” playlist on the official YouTube channel is the best starting point. It covers the basics of the interface, recording, and simple sound design.
Read more about “Why Is Diva So Good? The 5 Secrets Behind Its Analog Magic 🎹 (2026)”
How do I create custom racks in Reason Studios?
Add multiple devices to the rack. Use the Combinator to group them. Map the parameters you want to control to the Combinator’s front panel knobs. Save the Combinator preset as a “Custom Rack.”
Read more about “🎛️ What Plugins Work in Reason? The Ultimate 2026 Compatibility Guide”
What are the most effective sound design techniques in Reason?
Modulation is key. Use LFOs, envelopes, and sequencers to modulate filter cutoffs, pitch, and amplitude. Layering sounds (stacking multiple synths) and distortion (using Scream 4) are also highly effective.
Read more about “🚫 No Free u-he Diva VST Download? The Truth & Best Free Alternatives (2026)”
How can I use Reason Studios for mixing and mastering?
Use the built-in MClass or Mastering Tools suite. Route your tracks to buses for group processing. Use the Compressor, EQ, and Limiter on the master channel. The visual feedback in the mixer makes it easy to see your levels.
Read more about “🚀 Reason Lite: The Ultimate 2026 Guide to Upgrading & Mastering”
What are the essential plugins in Reason Studios for electronic music?
- Thor: The ultimate poly-synth.
- Subtractor: Great for bass and leads.
- Kong: The go-to drum machine.
- Scream 4: Essential for distortion and texture.
- RV70: A powerful reverb unit.
Read more about “🌌 15 Best Reason Refills for Ambient Soundscapes (2026)”
How do I integrate Reason Studios with other DAWs?
Install the Reason Rack Plugin. Open your host DAW, create a new track, and load the plugin. You can then build your rack inside the plugin window. MIDI and audio will pass seamlessly between the host and the plugin.
Read more about “🎤 10 Ways to Use Reason Refills for Unique Vocal Effects (2026)”
What are the latest features in the newest version of Reason Studios?
The latest version (Reason 13) introduced an updated browser with tags, the PolyTone dual-layer synthesizer, Ripley Space Delay, and new tools like the Sidechain Tool and Stereo Tool.
Read more about “Is Reason Studios Good for Beginners? The 2026 Verdict 🎹”