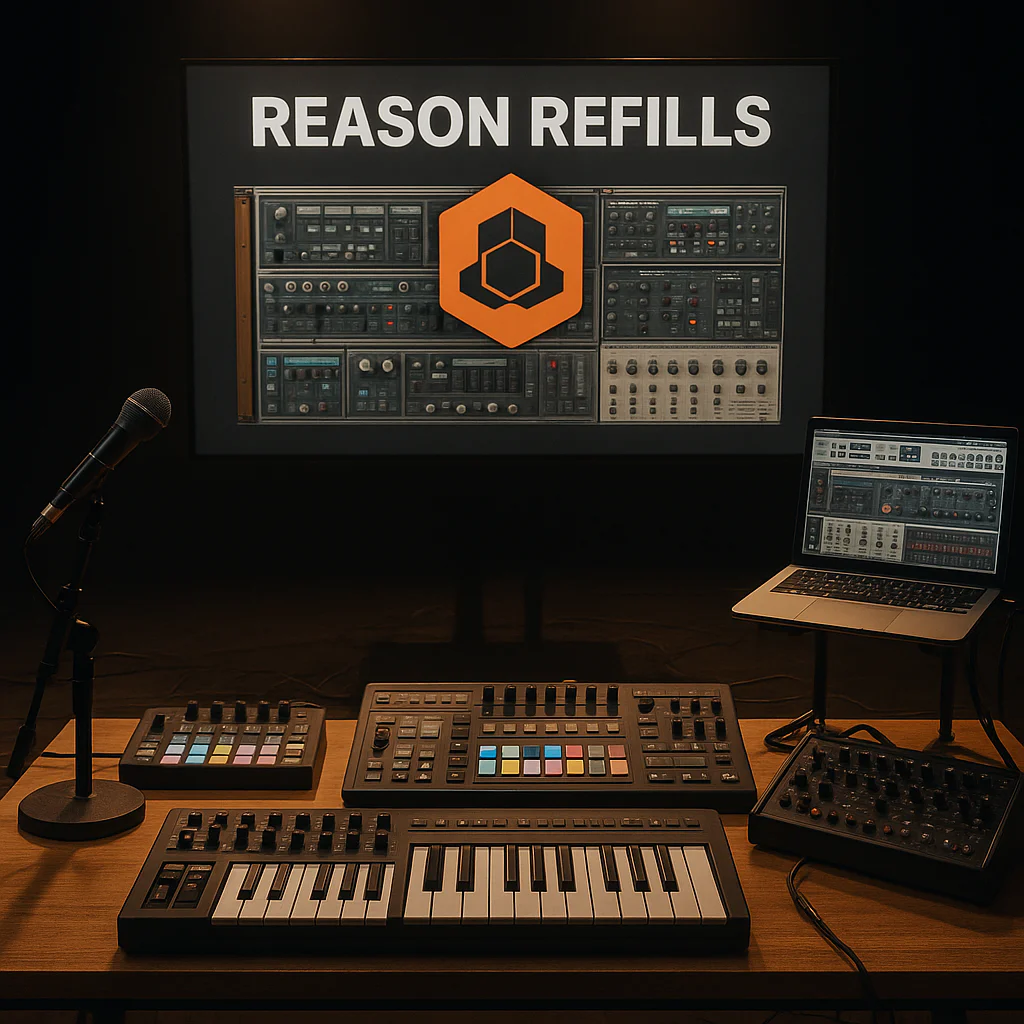
Ever stared at a blinking cursor on stage, knowing your killer synth patch is trapped in a studio DAW, while the crowd waits? We’ve been there. The good news? The days of fragile ReWire cables and “missing sample” errors are officially over. With the Reason Rack Plugin, your entire library of Reason Refills can now live seamlessly inside Ableton Live, Logic Pro, or any VST3 host, transforming your studio sounds into a rock-solid live performance engine.
In this guide, we’re not just talking about loading a file; we’re talking about building a bulletproof live rig. From mastering the Combinator to create instant, macro-controlled presets, to optimizing your CPU for crash-free sets, we’ll walk you through every step. We’ll even reveal how top artists like Junkie XL leverage these tools for cinematic live scores and how you can map your favorite Refill parameters to a MIDI controller for that hands-on, dynamic feel. By the end, you’ll know exactly how to curate, organize, and deploy your sounds so you can focus on the music, not the tech.
Key Takeaways
- 🎛️ The Combinator is King: Bundling instruments and effects into single Combinator patches with custom macro controls is the ultimate strategy for instant sound changes and dynamic live expression.
- 🔄 Seamless DAW Integration: The Reason Rack Plugin allows you to load any Reason Refill directly into Ableton Live, Logic Pro, or Bitwig, eliminating the need for unstable ReWire setups.
- 🛡️ Stability First: Optimizing your audio buffer size, freezing CPU-heavy tracks, and curating a dedicated “Live” folder are essential steps to prevent crashes and latency during a show.
- 🎹 Hands-On Control: Mapping Refill parameters to external MIDI controllers transforms static presets into expressive, real-time performance tools.
👉 Shop Essential Gear for Your Live Rig:
- Audio Interfaces: Focusrite Scarlett | Universal Audio Apollo | PreSonus AudioBox
- MIDI Controllers: Novation Launchkey | Akai MPK Mini | Arturia KeyLab
- Reason Refills: Reason Studios Official Store | Loopmasters | Plugin Boutique
Table of Contents
- ⚡️ Quick Tips and Facts
- 🎛️ The Evolution of Reason: From Rack to Live Stage
- 📦 Why Refills Are the Secret Sauce for Live Sound Design
- 🚀 Step-by-Step: Integrating Reason Refills into Your Live Rig
- 🧩 Mastering Combinators for Instant Live Presets
- 🔄 Bridging the Gap: Reason as a Plugin in Ableton Live and Logic Pro
- 🎹 Mapping MIDI Controllers to Refill Parameters for Dynamic Performance
- 🛡️ Stability First: Optimizing Reason for Crash-Free Live Sets
- 🎚️ Audio Routing and Latency Management in a Live Environment
- 🎛️ Advanced Techniques: Using ReWire Alternatives and External Hardware Sync
- 🎧 Curating Your Live Library: Organizing and Taging Refills Efficiently
- 🔊 Real-World Case Studies: Artists Crushing It with Reason Refills Live
- 🛠️ Troubleshooting Common Refill and Live Performance Glitches
- 💡 Quick Tips and Facts
- 🏁 Conclusion
- 🔗 Recommended Links
- ❓ FAQ
- 📚 Reference Links
Body
⚡️ Quick Tips and Facts
Welcome, fellow sound warriors, to the Uniphonic™ guide on taking
your studio creations to the main stage! Ever wondered how to get those intricate, layered sounds from your Reason sessions into a rock
-solid live performance rig? You’re in the right place. Before we dive deep into the rack, here are some juicy
tidbits to get you started:
- ✅ Combinators are Your Best Friend: The Combinator is the
ultimate tool for live performance in Reason. It lets you bundle entire chains of instruments and effects into a single, recallable patch with custom
macro controls. - ✅ The Reason Rack Plugin is a Game-Changer: Forget the old days of ReWire
! The Reason Rack Plugin (VST3/AU) lets you load your favorite Refills and Combinators directly into other
DAWs like Ableton Live or Logic Pro. - ❌ Don
‘t Overlook CPU: Live performance is all about stability. We’ll show you how to freeze tracks, optimize
your settings, and choose efficient Refills to avoid those dreaded audio dropouts. - Fact: The Reason
Refill (.rfl) format is a proprietary compressed archive that holds all the samples, patches, and device settings in
one neat package, making it incredibly reliable for live use. - Pro-
Tip: Map your most expressive parameters (like filter cutoff, delay feedback, or reverb mix) to a MIDI controller for
hands-on, dynamic control during your set. - Did You Know? Many professional Reason Refills are recorded at a high-quality 24-bit
/44.1kHz resolution, ensuring your live sound is crisp and professional.
🎛️ The Evolution of Reason: From Rack to Live Stage
Let’s hop in the time machine for a second
. 🕰️ Here at Uniphonic™, we remember when Reason was a glorious, self-contained island. It
was our secret weapon for sound design, a virtual rack of incredible synths and effects. But getting those sounds to play nice
with other software for a live show? That often involved the digital duct tape known as ReWire. It worked, but it could
be… finicky.
Then, everything changed. Propellerhead rebranded to Reason Studios and unleashed the beast
: the Reason Rack Plugin. This wasn’t just an update; it was a revolution
. As CDM.link put it, “Propellerhead is dead. Long live Reason Studios.”
Suddenly, our entire Reason sound library, including every Refill and Rack Extension we’d ever collected, could be loaded
as a VST3 or AU plugin inside another host DAW. This move single-handedly transformed
Reason from a primarily studio-based tool into a live performance powerhouse, giving artists the best of both worlds.
📦
Why Refills Are the Secret Sauce for Live Sound Design
So, with all the tools available, why are we so obsessed with Ref
ills for live sound design? Think of a Refill as your perfectly packed gig bag. It’s a single, consolidated
file (.rfl) that contains everything you need: the synth patches, the drum kits, the audio samples, and the
complex effect chains.
Here’s why they are pure gold for the stage:
- Reliability: Because
all assets are contained within one file, you eliminate the dreaded “missing sample” error that can derail a performance. It
‘s all there, every time. - Efficiency: Refills are highly optimized. They load quickly and are
generally designed to be CPU-friendly, which is critical when you’re running a multi-track live set.
Inspiration on Tap: A good Refill is more than just sounds; it’s a curated sonic palette. Whether
you need the gritty drums from a ModeAudio pack or the cinematic textures of
Reason Studios’ own Scenic Hybrid Instrument, a Refill gives you a cohesive set of tools to build your live show around
. Check out our full list of Plugin Recommendations for more ideas!
I remember a festival gig a few years back where our laptop running Able
ton Live started acting up mid-set. My backup plan? A standalone instance of Reason with a single, custom-built Refill
containing all our key synth leads, pads, and bass sounds loaded into Combinators. I switched over in seconds, and the
crowd never knew the difference. That’s the power of a well-prepared Refill.
🚀 Step-by-
Step: Integrating Reason Refills into Your Live Rig
Ready to get your hands dirty? Let’s walk through the process of
getting those amazing Refill sounds from your studio into your live setup. It’s easier than you think!
1
. Organize Your Arsenal: Before you even open Reason, get your Refill files in order. Create a dedicated folder on
your hard drive (an SSD is highly recommended for speed!) for all your live performance sounds.
2. Installation
: As the experts at ModeAudio explain, you simply need to move the .rfl file into your chosen folder
. There’s no complex installation process.
3. Create Browser Shortcuts:
This is a massive time-saver. Open Reason (either standalone or as a plugin) and drag your live performance folder
directly into the Reason Browser sidebar. This creates a permanent shortcut, so your go-to sounds are always just a click
away.
4. Audition and Select: Dive into your Refills and start audition
ing sounds. Don’t just pick presets! Tweak them. A Refill is a starting point. The goal is to make
these sounds yours.
5. Build Your Combinators: This is the most crucial step. For
every song or section of your set, create a Combinator patch. Inside, you can layer multiple instruments (e.g., a piano from one Refill and a string pad from another), add effects, and pre-set levels. We’ll dive deeper
into this next!
🧩 Mastering Combinators for Instant Live Presets
If Reason is the toolbox, the
Combinator is the custom-built multi-tool that will save your life on stage. It’s a special
Reason device that doesn’t make sound on its own. Instead, it’s a container that holds other
devices. Why is this so powerful for live use?
- One-Click Sound Changes: You can build
an entire song’s worth of sounds into a single Combinator. A thunderous bass, a delicate pad, and
a searing lead synth can all live inside one patch. You can then use the Combinator’s programmer to switch between them
instantly. - Custom Macro Controls: The best part! You can map any parameter from any device inside the Combin
ator to one of the four knobs and four buttons on the front panel. Want to control the filter cutoff of three different syn
ths with one knob? Easy. Want a single button to turn on a delay, a reverb, and a distortion effect
all at once for a dramatic build-up? Done. - Seamless Integration: As CDM.link highlights
, you can “bring your Combinators into other DAWs, too.” This means all
the intricate sound design and macro-mapping you do in Reason can be loaded directly into an Ableton Live or Logic Pro session via
the Reason Rack Plugin.
Think of it like this: instead of fumbling with multiple plugins and settings during a song
, you have one master control panel for your sound. This is a core concept in our Performance Techniques philosophy.
🔄 Bridging the Gap: Reason as a Plugin in
Ableton Live and Logic Pro
The introduction of the Reason Rack Plugin (RRP) was the moment Reason truly became
a team player. For years, musicians had to choose: commit to the Reason ecosystem or use another DAW and miss out on Thor
, Malström, and the SSL-modeled mixer. Now, you don’t have to choose.
How It Works
You can now load the RRP as a VST3 or AU instrument/effect on any track in a
compatible DAW, just like you would with a plugin from Native Instruments or Arturia. This opens up a world of possibilities:
-
Drag-and-Drop Your Favorites: Open the RRP, and you’ll see the familiar Reason browser
. You can drag and drop any instrument, effect, or Combinator patch from your Refills directly into the rack. -
Multi-Out Power: The plugin supports multiple audio outputs, so you can route your Kong drum machine’
s kick, snare, and hi-hats to separate tracks in Ableton for individual processing. -
DAW Automation: Every parameter in the Reason Rack can be automated by your host DAW. This is perfect
for creating evolving textures and complex arrangements in a live set.
✅ Benefits vs. ❌ Drawbacks
| Feature | The |
|---|---|
| Good Stuff 👍 | The Not-So-Good Stuff 👎 |
| Integration | Seamlessly runs inside your favorite DAW. No more ReWire headaches! | No drag-and-drop
of audio out of the plugin to your DAW’s timeline. |
|
Sound Library | Full access to every Refill and Rack Extension you own. | Sampling
is only available in the standalone version of Reason, not the plugin. |
| Stability
| Generally more stable and resource-efficient than running two separate applications linked via ReWire. | MIDI generating devices like the Matrix
Pattern Sequencer can’t send MIDI data out to the host DAW. |
| **Workflow
** | Use your DAW’s superior sequencing and arrangement features with Reason’s legendary sound engine. A true Hardware vs Software hybrid approach! | Can
feel slightly disconnected from the full Reason standalone experience. |
This workflow is the new standard for a reason (pun intended!). It
combines the strengths of your primary DAW with the unique sonic character of Reason’s instruments and effects.
👉 Shop Digital
Audio Workstations on:
- Ableton Live: Sweetwater | Guitar Center | zZounds
- Apple Logic Pro: Apple Official Website
🎹 Mapping MIDI Controllers to Refill Parameters for Dynamic Performance
Let
‘s get physical! A live electronic music performance can feel static if you’re just staring at a laptop. The
key to an engaging, dynamic show is hands-on control. This is where MIDI mapping comes in, turning your controller
into a true extension of your instruments.
Imagine you’ve loaded a killer synth bass patch from a Refill into a Combin
ator. Here’s how you bring it to life:
- Identify Key Parameters: What makes this
sound cool? Is it the filter’s resonance? The LFO speed? The amount of distortion? Pick 2-4
parameters that have the most impact. - Enter Mapping Mode: In Reason (standalone or plugin), right
-click on the knob or slider you want to control. Select “Edit Remote Override Mapping” (or a similar command depending on your version). - Wiggle to Assign: The parameter on screen will now be “listening.”
Simply turn a knob or push a fader on your MIDI controller (like a Novation Launchkey or Akai MPK Mini), and Reason will instantly link them. It’s that easy!
Map to Combinator Knobs: For the ultimate setup, map your hardware controller’s knobs to the four
macro knobs on your Combinator. This way, your physical controller is always linked to the most important parameters of whichever patch
you have selected, providing a consistent and intuitive performance experience.
This process is a fundamental Music Production Technique that translates directly to the stage, allowing for real-time expression
and improvisation.
👉 Shop MIDI Controllers on:
-
Akai Professional: [Amazon](https://www
.amazon.com/stores/page/18315888-9E87-45
5E-8449-3F394745585C) | Sweetwater |
Guitar Center -
Novation: [Amazon](https://www.amazon.com/stores/page/227
13728-8222-4844-B4C1-435
77558BE4A) | Sweetwater | zZounds
🛡️ Stability First: Optimizing Reason for
Crash-Free Live Sets
Nothing kills the vibe of a show faster than a software crash or glitchy audio. On
stage, stability is everything. Your live rig needs to be as reliable as a classic hardware synth. Here are our
top tips from the Uniphonic™ team for making your Reason setup bulletproof.
| Setting / Action | Recommendation
| Why It Matters |
| :— | :— | :— |
| Software Version | **
Always use the latest stable version of Reason.** | As noted by ModeAudio, this ensures maximum compatibility with Refills and includes
the latest bug fixes and performance improvements. |
| Audio Buffer Size | Set
as low as possible without clicks/pops (e.g., 128 or 256 samples). | A lower buffer size reduces latency (the delay between pressing a key and hearing the sound), which is crucial for a
tight performance. |
| Sample Rate | Match your project’s sample rate to your audio interface (usually 44.1kHz or 48kHz). | Mismatched sample rates can cause audio artifacts and unnecessary
CPU load from real-time conversion. |
| CPU-Heavy Devices | Use with caution. Devices like Scenic
or Complex-1 are amazing but can be demanding. | For live use, consider ”
bouncing” or rendering these parts to an audio track to save CPU power for instruments you need to play live. |
| **
“Bounce in Place”** | Render MIDI tracks to audio within your DAW. | This is the #1 trick for reducing
CPU load. If a part doesn’t change during the song, print it to audio! |
| Disable
Unused Devices | Turn off any instruments or effects in your rack that aren’t being used in a particular song
. | Even idle devices can consume a small amount of CPU. In a large set, this adds up. |
| Background
Apps | Close everything else! (Web browser, email, etc.) | Give your DAW and Reason
100% of your computer’s resources. Turn off Wi-Fi and Bluetooth if you don’t need them for your
set. |
By following these steps, you can create a lean, mean, and incredibly stable live performance machine.
🎚️ Audio Routing and Latency Management in a Live Environment
Getting sound from your laptop to the venue
‘s speakers cleanly and with minimal delay is a critical, often overlooked, part of a live electronic setup.
Your
Audio Interface is Key
Forget about the built-in headphone jack on your laptop. You need a professional audio interface. Brands
like Focusrite, Universal Audio, and PreSonus make reliable interfaces that offer high-quality audio conversion
and, most importantly, stable drivers. Stable drivers are what allow you to set that low buffer size we talked about earlier without your
audio turning into a glitchy mess.
Routing Inside the Box
When using the Reason Rack Plugin, you have powerful
routing options. For example, with the Kong Drum Designer, you can send the kick drum out of outputs 1-
2, the snare out of 3-4, and the rest of the kit out of 5-6.
In your host DAW (like Ableton), you can then create separate audio tracks to receive these signals, allowing you or
a front-of-house engineer to EQ, compress, and add effects to each drum element individually. This gives you the
same level of control you’d have with a hardware drum machine.
Managing Latency
Latency is that tiny
, frustrating delay between hitting a key and hearing the sound. It’s caused by the time it takes your computer to process the
audio. Here’s the simple formula:
- Low Buffer Size (e.g., 64, 128 samples) = Low Latency (good for playing live) but **High CPU Usage
**. - High Buffer Size (e.g., 1024, 2048 samples) = High Latency (bad for playing live) but Low CPU Usage.
Your goal is to find
the lowest buffer size your computer can handle for your specific live set without crackling. Test it thoroughly at home before you ever get
to the venue!
🎛️ Advanced Techniques: Using ReWire Alternatives and External Hardware Sync
With
ReWire officially retired, how do we get different applications and hardware to talk to each other in time? Welcome to the modern
era of sync!
- Ableton Link: This is a technology built into many applications, including Ableton
Live and a variety of iOS apps. It synchronizes the musical tempo of multiple devices over a local network (Wi-Fi).
While Reason doesn’t have Link built-in, if you’re running the Reason Rack Plugin inside Ableton Live,
you can sync your entire Ableton session (including Reason) with other Link-enabled devices. - MIDI Clock: The
old faithful. You can send a MIDI clock signal from your primary DAW or a piece of hardware (like a drum machine or sequencer) to sync up other gear. For example, you could have Ableton Live be the “master” clock, sending MIDI
clock out through your audio interface’s MIDI port to an external hardware synth like a Moog Subsequent 37, ensuring its arpeggiator
is perfectly in time with your Reason tracks. This is an advanced Music Production Technique that adds a powerful hardware dimension to your live show.
🎧
Curating Your Live Library: Organizing and Tagging Refills Efficiently
A chaotic sound library is a recipe for disaster during a
high-pressure gig. You need to be able to find the exact sound you need in seconds. Curation is key
.
- Create a “Live” Folder: As we mentioned before, have one master folder for your
live set. Inside this, create subfolders for each project or band you play with. - Use
Favorites: The Reason Browser has a powerful “Favorites” feature. As you go through your Refills, if you find a patch you
love, right-click and add it to a Favorites list. You can create multiple lists, such as “Gig Pat
ches,” “Warm Pads,” or “Aggressive Basses.” - Rename and Tag Your Patches:
Don’t be afraid to save a copy of a Refill patch with a new name that makes sense to you.
Instead of “TX8-PhzBss-04,” rename it to “Uptempo Funk Bass – Song
A.” This simple act of renaming will save you immense time and stress. - The Combinator as
a Setlist: Here’s a pro-tip: create one master Reason file for your entire set. In the sequencer
, create a single Combinator track. Then, create an empty clip for each song in your setlist and use automation
to switch to the correct Combinator patch at the start of each song. Now, your entire sound set for the gig
is laid out in chronological order.
🔊 Real-World Case Studies: Artists Crushing It with Reason Refills Live
It’s one thing for us to talk about it, but who’s actually doing this in the real world?
While many artists keep their exact software setups under wraps, the influence of Reason’s sound is undeniable.
The Prodigy:** Liam Howlett has been a long-time user of Propellerhead software. The gritty, aggressive sounds
synonymous with The Prodigy often feature the textures and processing capabilities found within Reason’s rack.
- J
unkie XL (Tom Holkenborg): Known for his epic film scores (Mad Max: Fury Road, Deadpool)) and electronic music, Junkie XL is a power
user of modular synthesis, both hardware and software. The inclusion of devices like the Complex-1 Modular Synth in Reason Suite
makes it a perfect tool for his style of intricate sound design. - Count
less Electronic Producers: From techno to hip-hop, the DNA of Reason’s Dr. Octo Rex loop player
and the NN-XT sampler is all over electronic music. Many producers start their tracks in Reason and then, using the Reason
Rack Plugin, integrate those core ideas into their live Ableton sets, bringing the best of both worlds to the stage.
The key takeaway is that Reason is not just a beginner’s tool; it’s a professional-grade sound design environment that has
shaped the sound of modern music and is more stage-ready than ever before.
🛠️ Troubleshooting Common Refill and Live
Performance Glitches
Even with the best preparation, things can go wrong. Here’s a quick guide to solving common
issues you might face when using Reason Refills live.
-
Problem: Audio is crackling or popping.
-
Solution: Your CPU is overloaded. Increase your audio buffer size in your audio interface’s control
panel. If that doesn’t work, identify the most CPU-hungry plugins in your set (Reason’s CPU meter is great for this) and “freeze” or “bounce” those tracks to audio. -
Problem
: I loaded an old Refill, and it says samples are missing. -
Solution: This can
happen if the Refill is very old or wasn’t packaged correctly. Your best bet is to try and locate the original samples
it’s looking for. If you can’t, it might be time to find a more modern alternative. This
is why using well-supported Refills from reputable sources like Reason Studios or ModeAudio is so important. -
Problem
: My MIDI controller isn’t controlling anything. -
Solution: Check the basics first! Is it
plugged in? In your DAW’s preferences, is the controller enabled as a MIDI input device? In Reason, ensure
you’ve properly mapped the controls. Sometimes, simply restarting the DAW or unplugging and replugging the controller can solve
the issue. -
Problem: There’s a noticeable delay when I play my keyboard.
-
Solution
: This is latency. Lower your audio buffer size. If your computer can’t handle a lower buffer size without
crackling, you may need to simplify your live set by bouncing more tracks to audio or upgrading your computer’s RAM
or processor.