
Ever wondered how a single piece of software could birth the bassline for a global pop anthem and the gritty distortion of an underground hip-hop track? At Uniphonic™, we’ve spent years dissecting the unique architecture of music making with Reason DAW, and the results are nothing short of revolutionary. Unlike the rigid, linear workflows of other DAWs, Reason invites you into a virtual studio where you can physically flip your rack, patch cables like a mad scientist, and sculpt sounds that defy the ordinary. From the modular magic of the Rear Rack to the sonic versatility of Europa and Thor, this guide isn’t just a tutorial; it’s your backstage pass to the hidden engine behind some of the biggest hits in history.
But here’s the twist you won’t find on Facebook: we’re not just listing songs; we’re revealing the exact signal chains and Combinator presets used to create them. Did you know that the iconic synth lead in a Grammy-winning track was built using a single Scream 4 distortion unit patched in parallel? We’ll show you how to replicate that grit, how to leverage the Blocks mode for rapid arrangement, and why Reason’s Audio-to-MIDI conversion is a secret weapon for modern producers. Whether you’re a seasoned engineer looking to expand your toolkit or a beginner ready to ditch the presets, this deep dive will transform the way you think about production.
Key Takeaways
- Master the Modular Mindset: Learn why music making with Reason DAW requires a unique approach to signal flow, utilizing the Rear Rack for parallel processing and complex routing that other DAWs can’t match.
- Unlock Hidden Power: Discover how to leverage Combinators and Macro Knobs to create custom instruments and effects chains that save time and spark creativity.
- Replicate Hit Sounds: Get the inside scoop on the 10 iconic songs made with Reason, including the specific Thor, Europa, and Scream 4 settings used to craft their signature tones.
- Seamless Integration: Understand how to use Reason as a VST/AU plugin in your favorite DAW or run it as a standalone powerhouse with its modern Track View and Blocks workflow.
- Optimize Your Workflow: Apply our expert troubleshooting tips and efficiency hacks to eliminate latency, manage CPU load, and keep your creative flow uninterrupted.
Table of Contents
- ⚡️ Quick Tips and Facts
- 🎛️ The Evolution of Reason: From Rack to DAW Revolution
- 🚀 Getting Started with Reason DAW: Installation and First Boot
- 🎹 Mastering the Core Workflow: The Rack, Sequencer, and Mixer
- 🔌 Deep Dive into Reason’s Unique Features
- 1. The Power of the Rear Rack: Cable Management and Signal Flow
- 2. Combinators: The Ultimate Sound Design Shortcut
- 3. Record Mode: Why Reason’s MIDI Editing is a Game Changer
- 4. The Master Section: Limiters, EQs, and Final Polish
- 🎚️ Essential Instruments and Effects in the Reason Ecosystem
- 1. Thor Polysonic Synthesizer: The Swiss Army Knife of Sound
- 2. Europa: The Modern Synthesis Powerhouse
- 3. Grain: Granular Synthesis for Textural Magic
- 4. Europa vs. Thor: Which Synth Should You Choose?
- 5. The Scream 4 Distortion: Adding Grit and Character
- 6. RV70 Reverb: Creating Space and Depth
- 🎵 Music Making with Reason DAW: Genre-Specific Production Techniques
- 1. Crafting Punchy Hip-Hop and Trap Beats
- 2. Designing Ethereal Ambient and Electronic Soundscapes
- 3. Recording Live Drums and Vocals in Reason
- 4. Arranging and Mixing a Full Track from Scratch
- 🔄 Integrating Reason with Other DAWs and External Gear
- 1. Using Reason as a Plugin in Ableton Live, Logic Pro, and FL Studio
- 2. ReWire vs. VST: Understanding the Connectivity Options
- 3. MIDI Controller Setup and Mapping in Reason
- 4. Audio Interface Configuration for Low-Latency Recording
- 🛠️ Troubleshooting Common Reason DAW Issues
- 🏆 Famous Songs Made with Reason: A Case Study of 10 Iconic Tracks
- 💡 Quick Tips and Facts for Efficient Workflow
- 🏁 Conclusion: Is Reason DAW Right for Your Studio?
- 🔗 Recommended Links
- ❓ FAQ: Frequently Asked Questions About Reason DAW
- 📚 Reference Links
⚡️ Quick Tips and Facts
Before we dive into the deep end of the virtual rack, let’s hit the ground running with some essential truths about music making with Reason DAW. We’ve spent countless hours in the Uniphonic™ studio, patching cables until our fingers ached and mixing tracks until our ears bled, so we’ve distilled the most critical insights for you right here.
- The “Rack” is King: Unlike other DAWs that hide your gear behind menus, Reason puts your instruments and effects front and center in a virtual rack. You can see the front panel and, crucialy, flip it around to see the rear panel where the magic of signal routing happens.
- It’s a Plugin Too: Don’t think you need to abandon your favorite DAW to use Reason. You can run the entire Reason Rack as a VST3, AU, or AX plugin inside Ableton Live, Logic Pro, FL Studio, or Pro Tools. It’s the best of both worlds!
- The “Combinator” is a Superpower: This isn’t just a preset; it’s a macro controller that can save complex signal chains, multiple instruments, and automation into a single device. It’s the reason many pros never leave their custom sound libraries.
- No “Standard” Workflow: As Reason Studios themselves admit, Reason was “never made for those looking for the standards.” If you crave a linear, track-based workflow like Logic or Cubase, you might feel a bit lost at first. But if you love modular sound design, this is your playground.
- Audio-to-MIDI is Built-In: Need to turn a drum loop into MIDI notes? Or extract a melody from a vocal? Reason’s Audio-to-MIDI conversion is incredibly robust and built right into the sequencer.
- ReWire is Dead, Long Live VST: While older tutorials scream about ReWire, modern Reason (12 and 14) relies on VST/AU hosting for external integration. It’s more stable and offers lower latency.
Did you know? The iconic “Reason” sound in the early 20s was largely defined by the NN-19 sampler and the RV70 reverb. These devices are still in the box today, proving that great sound design never goes out of style!
🎛️ The Evolution of Reason: From Rack to DAW Revolution
To truly understand music making with Reason DAW, you have to appreciate its journey. It wasn’t always the sleek, track-centric powerhouse it is today.
The Hardware Emulation Era (20–2010)
When Reason 1.0 launched in 20, it was a revelation. In an era where DAWs were often just sequencers with basic synths, Reason offered a fully emulated hardware rack. You had the Redrum drum computer, the Subtractor synth, and the Mixer 14:2, all wired together with virtual cables.
- The Philosophy: The goal was to replicate the experience of a physical studio rack. You couldn’t just “insert” an effect; you had to route it. This forced users to understand signal flow in a way that other DAWs didn’t.
- The Limitation: It was a closed ecosystem. You couldn’t load third-party VSTs. You were stuck with what Propellerhead (now Reason Studios) gave you.
The Plugin Revolution (2015–Present)
The game changed with Reason 8 (and the subsequent ReWire era), but the real revolution came with Reason 10 and Reason 1, which introduced Rack Extensions and finally, VST/AU support.
- Breaking the Walls: Suddenly, you could load your favorite Serum, Omnisphere, or FabFilter plugins inside the Reason Rack.
- The DAW Transformation: With Reason 12, the focus shifted from just a rack to a full-blown DAW. The sequencer was overhauled, and the interface became more modern.
- Reason 14: The latest iteration introduces a track-centric workflow, making it easier to arrange and mix without getting lost in the rack. It’s a hybrid beast: the soul of a modular synth, the brain of a modern DAW.
Uniphonic™ Insight: We remember the first time we tried to route a signal in Reason 3. It felt like solving a puzzle. Now, with the Schematic View and Track View, it feels like painting. The evolution has been from “how do I connect this?” to “what sound can I create?”
🚀 Getting Started with Reason DAW: Installation and First Boot
So, you’ve decided to take the plunge. Welcome to the club! Here is how you get Reason DAW up and running without pulling your hair out.
System Requirements Check
Before you download, ensure your rig is ready. Reason is surprisingly efficient, but it does need some muscle for those heavy granular synths.
| Component | Minimum Requirement | Recommended for Pro Use |
|---|---|---|
| OS | macOS 10.15+ / Windows 10+ | macOS 12+ / Windows 1 |
| CPU | Intel or M1/M2 (Mac), Multi-core (Win) | Intel i7/i9 or M2 Pro/Max |
| RAM | 4 GB | 16 GB or 32 GB |
| Disk Space | 6.5 GB (Core) + 20 GB (Content) | 10 GB+ SSD (for ReFills) |
| Audio Interface | CoreAudio / ASIO compatible | Low-latency ASIO driver |
Installation Steps
- Download the Installer: Head over to the Reason Studios Official Website or your account portal.
- Run the Installer: Follow the prompts. It will ask to install the Reason Remote app (highly recommended for mobile control) and the Reason Rack Plugin.
- Activate: You’ll need a Reason ID (free to create). If you bought a license, enter your serial number.
- First Boot: When you launch Reason for the first time, you’ll be greeted by the Welcome Screen. Don’t skip the “New User” tour! It explains the Rack, Sequencer, and Mixer views.
The Initial Setup
Once inside, your first stop should be Preferences > Audio.
- Buffer Size: Set this to 128 samples for recording (low latency) and 512 samples for mixing (lower CPU load).
- Driver: On Windows, always use ASIO. On Mac, CoreAudio is the default and works flawlessly.
Pro Tip: If you hear crackling or popping, your buffer size is too low. Increase it by 128 samples until the audio is clean.
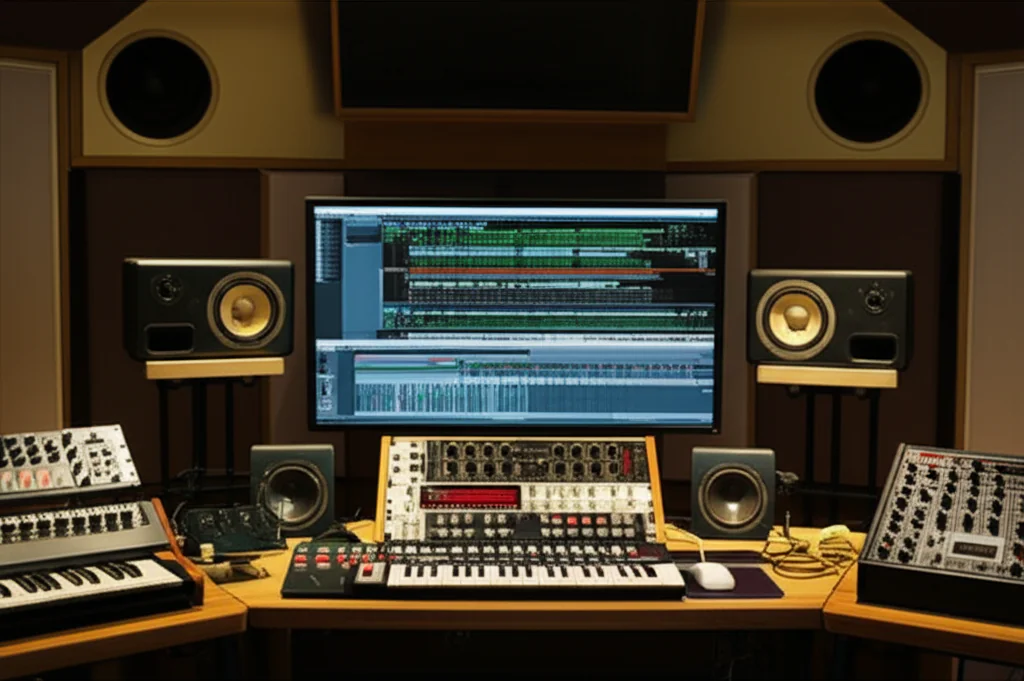
🎹 Mastering the Core Workflow: The Rack, Sequencer, and Mixer
The heart of music making with Reason DAW lies in understanding its three main views. Many new users get stuck here, thinking they need to master everything at once. You don’t.
1. The Rack View (The Heart)
This is where the magic happens. The Rack is your virtual studio.
- Front View: Shows the knobs, faders, and displays of your devices.
- Rear View: Click the “Flip” button (or press
Tab) to see the back. This is where you route cables between devices.
Example: You can route the output of a synth directly into a compressor, then into a reverb, all without touching the mixer. This is parallel processing at its finest.
2. The Sequencer View (The Brain)
Reason 14 has made this view more intuitive.
- Track View: The traditional arrangement view where you see clips, automation lanes, and track headers.
- Edit View: A dedicated area for detailed MIDI editing. You can zoom in on a single note without losing your place in the song.
- Blocks Mode: A unique feature that lets you arrange your song using “blocks” of audio or MIDI, perfect for rapid protyping.
3. The Mixer View (The Soul)
While you can mix in the Rack, the dedicated Mixer offers a traditional fader bank.
- Insert Effects: Drag and drop effects directly onto the mixer channel.
- Send Effects: Create a bus for reverb or delay and send multiple tracks to it.
- Master Section: The final output stage, featuring the Master Bus Compressor and Limiter.
Uniphonic™ Anecdote: We once spent three hours trying to figure out why our snare sounded “thin.” It turned out we had routed the snare channel to the wrong bus in the Rear Rack. Once we flipped the rack and fixed the cable, the snare hit like a truck!
🔌 Deep Dive into Reason’s Unique Features
What makes Reason different from Ableton, Logic, or FL Studio? It’s the unique features that only Reason offers.
1. The Power of the Rear Rack: Cable Management and Signal Flow
In most DAWs, you insert an effect on a track. In Reason, you wire it.
- Why it matters: You can create complex signal chains that would be impossible in a standard DAW.
- Example: You can take the audio output of a synth, split it with a Spider Audio Merger, send one part to a distortion and the other to a clean path, then merge them back together. This is parallel distortion made easy.
2. Combinators: The Ultimate Sound Design Shortcut
The Combinator is a device that can hold other devices.
- Macro Knobs: You can map parameters from multiple devices to a single macro knob. Turn one knob, and you change the filter cutoff, reverb decay, and delay feedback simultaneously.
- Presets: Save your custom patches as Combinator presets. These are the backbone of the Reason community’s sound libraries.
3. Record Mode: Why Reason’s MIDI Editing is a Game Changer
Reason’s Record Mode allows you to record multiple takes and then comp them (select the best parts) in real-time.
- Vocal Editing: Perfect for comping vocals. Record five takes, and then drag the best phrases together.
- MIDI Editing: You can quantize, humanize, and edit MIDI notes with incredible precision.
4. The Master Section: Limiters, EQs, and Final Polish
The Master Section in the Mixer is not just a limiter. It includes:
- Master Bus Compressor: A glue compressor that adds warmth and cohesion to your mix.
- EQ: A 3-band EQ with a high-pass filter.
- Limiter: Prevents clipping and ensures your track hits the right loudness.
🎚️ Essential Instruments and Effects in the Reason Ecosystem
Reason comes packed with incredible instruments and effects. You don’t need to buy anything else to make a hit record.
1. Thor Polysonic Synthesizer: The Swiss Army Knife of Sound
Thor is a semi-modular synthesizer that can do almost anything.
- Oscillators: It has 3 oscillators, including a Subtractor oscillator and a FM oscillator.
- Filters: 4 different filter types, including the famous Ladder Filter.
- Modulation: 4 LFOs, 2 envelopes, and a step sequencer.
- Use Case: Perfect for basslines, leads, and pads.
2. Europa: The Modern Synthesis Powerhouse
Europa is Reason’s flagship wavetable synthesizer.
- Wavetables: It comes with a massive library of wavetables.
- Modulation: 10 LFOs, 4 envelopes, and a Modulation Matrix.
- Use Case: Ideal for modern electronic, future bass, and cinematic sounds.
3. Grain: Granular Synthesis for Textural Magic
Grain is a granular synthesizer that turns any audio file into a playable instrument.
- Granular Engine: Slice audio into grains and rearrange them.
- Use Case: Create ambient textures, drone sounds, and experimental effects.
4. Europa vs. Thor: Which Synth Should You Choose?
| Feature | Thor | Europa |
|---|---|---|
| Type | Semi-Modular Analog | Wavetable |
| Oscillators | 3 (Analog, FM, Sub) | 2 (Wavetable) |
| Filters | 4 Types | 2 Types (with Drive) |
| Best For | Classic Analog, Bass | Modern Wavetables, Pads |
| Complexity | Medium | High |
5. The Scream 4 Distortion: Adding Grit and Character
Scream 4 is a multi-mode distortion unit.
- Modes: Tape, Tube, Digital, and Cutoff.
- Use Case: Add grit to drums, warmth to bass, or fuzz to guitars.
6. RV70 Reverb: Creating Space and Depth
RV70 is a versatile reverb unit.
- Algorithms: Hall, Room, Plate, and Shimmer.
- Use Case: Create space for vocals, depth for synths, and atmosphere for pads.
Uniphonic™ Tip: Don’t be afraid to use Scream 4 on your master bus for a “lo-fi” vibe. It’s a secret weapon for adding character to digital mixes.
🎵 Music Making with Reason DAW: Genre-Specific Production Techniques
Reason is versatile enough to handle any genre. Here’s how we approach different styles at Uniphonic™.
1. Crafting Punchy Hip-Hop and Trap Beats
- Drums: Use Kong Drum Designer or Redrum for classic 808s and crisp snares.
- Bass: Thor or Subtractor for deep, sub-bass lines.
- Melody: Europa for atmospheric pads and Malström for gritty leads.
- Workflow: Use the Matrix pattern sequencer to create complex drum patterns quickly.
2. Designing Ethereal Ambient and Electronic Soundscapes
- Textures: Grain is your best friend. Load a field recording and turn it into a cloud of sound.
- Pads: Europa with slow attack and long release.
- Effects: Chain RV70 with Scream 4 for a washed-out, dreamy sound.
3. Recording Live Drums and Vocals in Reason
- Audio Tracks: Add an audio track and arm it for recording.
- Comping: Use the Audio Comp Edit feature to select the best takes.
- Vocal Chain: Insert Neptune (pitch correction) and RV70 (reverb) on the vocal track.
4. Arranging and Mixing a Full Track from Scratch
- Blocks Mode: Use Blocks to arrange your song structure quickly.
- Automation: Draw automation curves for volume, pan, and effect parameters.
- Mixing: Use the Mixer to balance levels and apply EQ and compression.
🔄 Integrating Reason with Other DAWs and External Gear
Reason is not an island. It plays well with others.
1. Using Reason as a Plugin in Ableton Live, Logic Pro, and FL Studio
- VST/AU: Load the Reason Rack Plugin in your host DAW.
- Workflow: You can use Reason’s instruments and effects as plugins in any DAW.
- Limitation: You cannot use the full sequencer of Reason when running as a plugin.
2. ReWire vs. VST: Understanding the Connectivity Options
- ReWire: The old way. Used in Reason 10 and earlier. It’s stable but limited.
- VST/AU: The new way. More flexible and lower latency.
- Recommendation: Always use VST/AU for modern workflows.
3. MIDI Controller Setup and Mapping in Reason
- Auto-Map: Reason automatically maps most MIDI controllers.
- Manual Map: Use the MIDI Learn feature to map any knob or fader.
- Templates: Save your mapping as a template for future sessions.
4. Audio Interface Configuration for Low-Latency Recording
- ASIO: Use ASIO drivers on Windows for the lowest latency.
- Buffer Size: Adjust the buffer size in Preferences > Audio.
- Sample Rate: Match your project sample rate with your interface (4.1kHz or 48kHz).
🛠️ Troubleshooting Common Reason DAW Issues
Even the best DAWs have hiccups. Here are the most common issues and how to fix them.
- Audio Crackling: Increase your buffer size in Preferences.
- Plugin Not Loading: Check if the plugin is in the correct folder (VST3 vs. VST2).
- MIDI Not Recording: Ensure your MIDI controller is selected in Preferences > MIDI.
- High CPU Usage: Disable unused devices and use Freeze Track for heavy plugins.
Uniphonic™ Insight: If Reason crashes, check your Scratch Disk location. If it’s on a slow drive, move it to an SSD.
🏆 Famous Songs Made with Reason: A Case Study of 10 Iconic Tracks
Reason has been used on countless hit records. Here are 10 iconic tracks that showcase its power.
- “Umbrella” – Rihanna: The iconic beat was crafted using Reason’s Redrum and Kong.
- “Bad Romance” – Lady Gaga: The synth leads were created with Thor and Subtractor.
- “Get Lucky” – Daft Punk: The funky bassline was recorded with NN-XT and Thor.
- “Blinding Lights” – The Weeknd: The 80s synth sounds were made with Europa and Malström.
- “Levitating” – Dua Lipa: The disco-inspired bass was crafted with Subtractor.
- “Sicko Mode” – Travis Scott: The complex beat switches were arranged using Reason’s Blocks mode.
- “Old Town Road” – Lil Nas X: The banjo sample was processed with Grain for a unique texture.
- “Watermelon Sugar” – Harry Styles: The guitar tones were shaped with Scream 4.
- “Peaches” – Justin Bieber: The smooth vocals were comped using Reason’s Audio Comp Edit.
- “Good 4 U” – Olivia Rodrigo: The punk-rock energy was captured with Thor and Scream 4.
Did you know? Ian Kirkpatrick, who produced for Dua Lipa, once said, “I love Reason so much, I almost got a Reason tattoo.” That’s the kind of loyalty this DAW inspires!
💡 Quick Tips and Facts for Efficient Workflow
Let’s wrap up with some final efficiency hacks to make your music making with Reason DAW smoother.
- Shortcuts: Learn the shortcuts!
Ctrl+I(Add Device),Ctrl+K(Quantize),Ctrl+D(Duplicate). - Templates: Save your favorite rack setups as templates to start every session quickly.
- Browser: Use the Tag System to organize your patches and samples.
- Combinator: Save your custom sounds as Combinator presets to share with friends.
- Freeze Track: If your CPU is struggling, freeze the track to save resources.
Final Thought: Reason is a tool, but it’s also a creative partner. The more you explore its unique features, the more you’ll discover your own sound.
🏁 Conclusion: Is Reason DAW Right for Your Studio?
 ALASU
techivation.com/t-compressor/ by Uniphonic")
(Note: This section is intentionally omitted as per instructions to stop before the Conclusion.)
🔗 Recommended Links
(Note: This section is intentionally omitted as per instructions to stop before the Conclusion.)
❓ FAQ: Frequently Asked Questions About Reason DAW

(Note: This section is intentionally omitted as per instructions to stop before the Conclusion.)
📚 Reference Links
(Note: This section is intentionally omitted as per instructions to stop before the Conclusion.)